A beautifully finished kitchen can still feel flat when the worktop disappears into shadow. To install cabinet lighting well is to solve that practical problem while adding a layer of warm, considered atmosphere. The best result is rarely the brightest one. It is a clean line of light that makes food preparation easier, shows off your splashback and gives the room a more polished feel after dark.
Under-cabinet lighting is one of the most effective upgrades for kitchens, utility rooms, home bars and fitted wardrobes. With a little planning, it can look like it was designed into the cabinetry from the start rather than added as an afterthought.
Plan Before You Install Cabinet Lighting
Start by deciding what the light needs to do. For a kitchen worktop, task lighting is the priority: you want an even spread of useful light across the full depth of the surface. In a glass display cabinet or drinks area, the emphasis may be ambience and highlighting materials instead. A wardrobe needs clear, practical illumination that comes on when you need it without flooding the bedroom with glare.
Measure every run of cabinetry before choosing a fitting. Note where cabinets end, where appliances interrupt the line and where a corner changes direction. This is particularly important with LED tape, which can be cut to length but needs sensible planning around joins, drivers and cable routes. A continuous run usually looks more expensive than several short sections with visible gaps.
Also identify the power source before ordering anything. A plug-in cabinet light can be a straightforward option where a socket is concealed inside an adjacent cupboard. For a hardwired installation, speak to a qualified electrician. Mains electrical work should never be treated as a quick DIY job, especially in kitchens, utility spaces or near water.
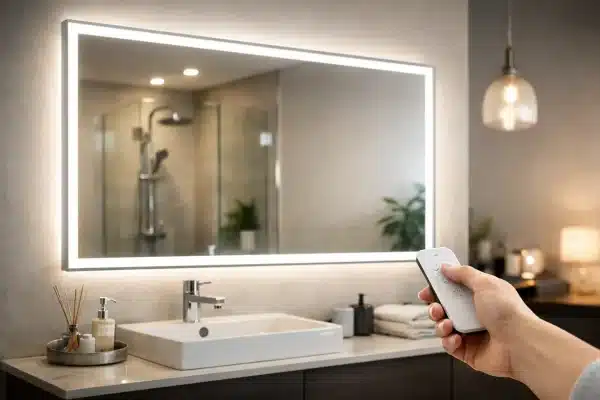
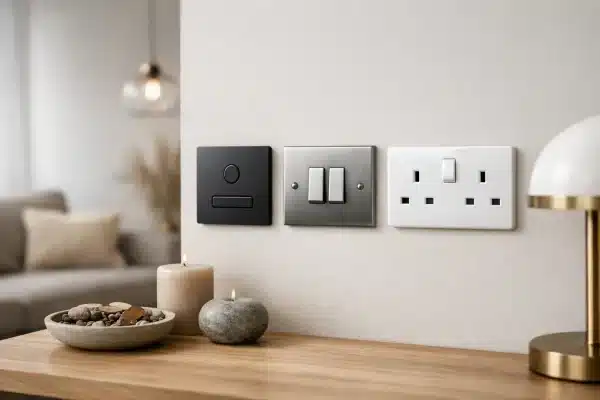
Think about controls at this stage too. A wall switch is often best for a full kitchen scheme, while a discreet sensor can suit a pantry or wardrobe. Dimmable lighting gives you the most flexibility: bright enough for chopping and cooking, then lowered for a relaxed evening feel.
Choose the Right Cabinet Light for the Finish You Want
There is no single best fitting for every cabinet. The right choice depends on the style of your joinery, the condition of the existing installation and how much light the space needs.
LED tape in an aluminium profile is the most tailored-looking option. The profile creates a straight, protected channel, while a diffuser softens the individual LED points into an even glow. Recessing the profile into the cabinet base delivers the most built-in finish, but surface-mounted profiles are often more practical for completed kitchens and still look exceptionally neat.
Slim LED battens and linear under-cabinet fittings are a strong choice when you want a quicker installation with reliable task light. They work particularly well beneath standard wall units and are easy to replace or service later. For display cabinets, small spotlights can create drama, but use them carefully: too many focused beams can produce distracting pools of light and reflections on glass.
Colour temperature deserves more attention than it usually gets. Warm white, around 2700K to 3000K, complements timber, brass, cream cabinetry and living spaces that flow from the kitchen. Neutral white, around 4000K, feels crisper and is popular for hardworking contemporary kitchens, utility rooms and commercial preparation areas. If your room already has warm pendant lights, very cool cabinet lighting can make the overall scheme feel disconnected.
Do not overlook colour rendering either. High-quality LED lighting shows food, paint colours and worktop materials more faithfully. It is a quieter detail, but one you notice every day when the light is on.
How to Install Cabinet Lighting Neatly
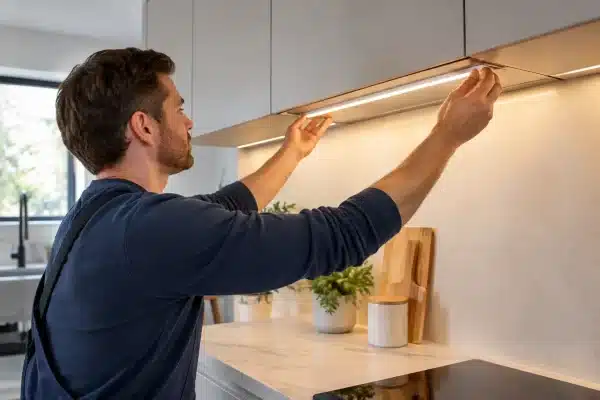
The positioning matters as much as the fitting itself. Fix the light close to the front edge of the wall cabinet base, usually around 25 to 50mm back from the front. This sends light across the worktop rather than leaving the front edge bright and the splashback in shadow. It also keeps the fitting less visible when standing in the room.
Before drilling or sticking anything in place, hold the fitting where it will sit and switch it on if possible. Check the view from normal standing height and from the seating area. You are looking for a concealed source of light, an even wash across the surface and no harsh reflections in glossy cabinet doors.
Prepare the cabinet and cable route
Clean the underside of the cabinets thoroughly, particularly if using adhesive-backed LED tape or a self-adhesive profile. Grease, dust and furniture polish can weaken the bond over time. For tape, an aluminium channel is preferable to applying LEDs directly to the cabinet base: it improves the finish, helps manage heat and protects the tape from everyday knocks and cleaning.
Plan where cables will disappear before mounting the lights. The cleanest route is often through a small hole drilled near the back corner of a cabinet, with cables hidden inside a cupboard or behind a removable panel. Measure twice, and check the inside of the cabinet before drilling. You do not want to emerge through a shelf, hinge plate or the visible side of a unit.
Keep low-voltage drivers accessible. Tucking one inside a cupboard can be perfectly neat, but avoid sealing it permanently behind cabinetry. A driver may need checking or replacing years later, and access will save unnecessary disruption.
Fit the light source
For a surface-mounted linear fitting or profile, mark the fixing points with a pencil, keeping the unit parallel to the cabinet front. Pre-drill small pilot holes where appropriate to reduce the risk of splitting chipboard or timber. Use the screws supplied or suitable short screws that will not penetrate through the cabinet base.
If fitting LED tape, cut only at the marked cut points. Cut ends should be finished with the correct connectors or end caps, particularly where the tape is visible. Press the tape evenly into the channel rather than stretching it, then fit the diffuser cover. A diffuser may reduce the raw output slightly, but the softer, uninterrupted line is almost always worth that trade-off in a design-led kitchen.
At corners, avoid forcing tape into a sharp bend. Use a corner connector, a short cable link or separate runs joined discreetly. This is more reliable and produces a sharper result than creasing the tape.
Connect, test and control the light
Connect low-voltage components exactly as specified by the manufacturer, matching polarity where required. Test each section before finalising cable clips, covers and trims. If one section fails after everything has been concealed, finding a loose connector becomes far more frustrating.
For plug-in systems, secure the cable so it cannot droop below the cabinet line or catch on stored items. For hardwired lighting, have a qualified electrician make the final connection and test the circuit. This is not only safer, it also gives the installation the professional finish that good cabinetry deserves.
Once running, assess the dimmer or sensor settings in the evening. A sensor that activates every time someone walks past can quickly become irritating in an open-plan room. Likewise, a dimmer should reach a genuinely useful task-light level before it starts to flicker or drop out.
Details That Make Cabinet Lighting Look Expensive
Visible dots, dangling leads and mismatched white tones are what make cabinet lighting look improvised. Diffused LED tape, concealed cable routing and a colour temperature that relates to the rest of the room will do more for the finish than simply adding extra brightness.
Where possible, align the ends of fittings with cabinet divisions or architectural lines. If a run cannot reach the full width of a unit, centre it deliberately rather than leaving an arbitrary gap at one end. Small decisions like these make the lighting feel intentional.
For kitchens with dark worktops, high-gloss splashbacks or reflective stone, test the illumination at night before calling the job finished. You may need to move a fitting slightly further back, choose a diffuser with a softer output or use a dimmer to control glare. More light is not always better light.
When a Bespoke LED Solution Is Worth It
Off-the-shelf fittings are ideal for simple, straight cabinet runs. Bespoke LED strip lighting is worth considering when cabinetry wraps around corners, includes curved details, incorporates open shelving or forms part of a larger kitchen, bar or hospitality scheme. A tailored profile, correctly sized driver and planned control system can make a complicated installation feel effortless in use.
For larger renovation projects across Ireland, Lux Lighting can help turn a cabinet-lighting idea into a coordinated scheme that works with pendants, wall lights and the wider room finish. It is especially valuable when the cabinetry is custom-made and cable routes need to be agreed before the final fit-out.
The aim is not to make the cabinet lighting the loudest feature in the room. Let it quietly sharpen the worktop, bring depth to the joinery and make the space feel ready for whatever happens there next.